- Thu 31 October 2019
- Cloud
With my everyday job I get in touch with huge on-premise Kubernetes clusters (500+ nodes), full of complex and interesting things. Unfortunately they can't be used as playgrounds, so I always end up building something locally (minikube, Kind, Multipass/Mikrok8s) which almost always is not the ideal solution unless you want to use them as development environments. On the other hand, here in my homelab I've couple of powerful enough 1U Supermicro where I installed both VMware/Openstack and then Kubernetes on top of them, but they are pretty much noisy and expensive to maintain always on at home.
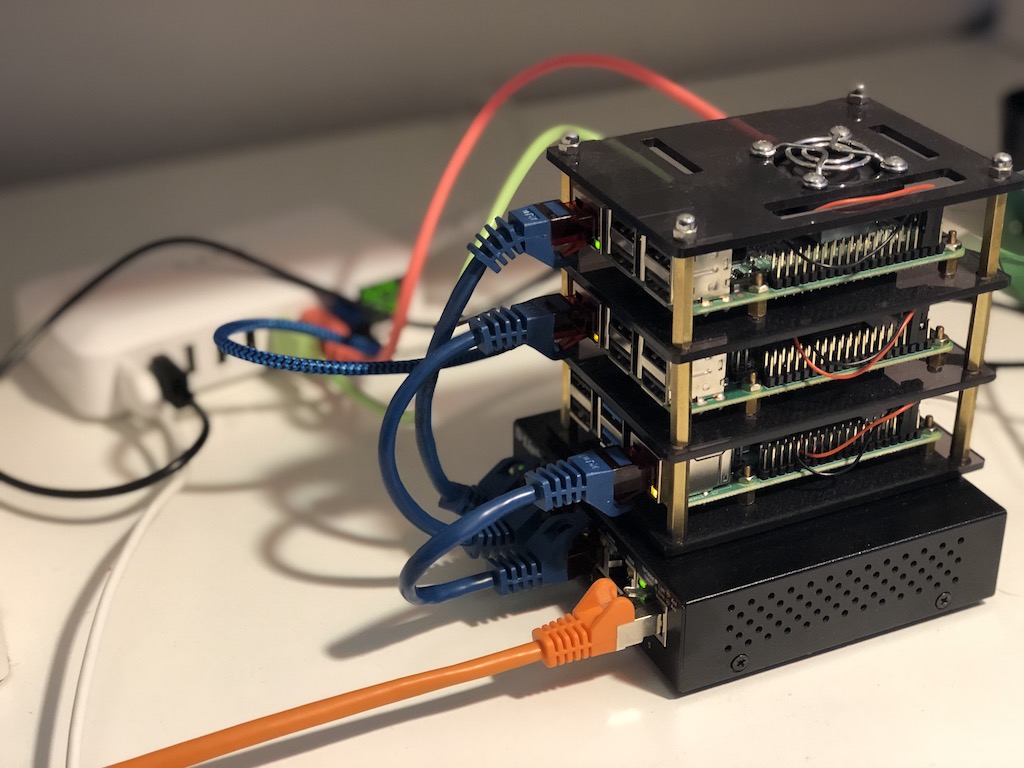
For that reason I always promised myself to build a Raspberry cluster as soon as I had time. Finally last weekend it was a rainy and ugly day here in Berlin, so I found a couple of hours to build it. I used the Raspys and k3s I had at home, so it's not consistent as hw build, but it works pretty well.
Hardware list
This is the list of hardware I used:
- 1x Raspberry Pi 4 Model B Rev 1.1 (4Gb of Ram)
- 1x Raspberry Pi 3 Model B+ Rev 1.3
- 1x Raspberry Pi 3 Model B Rev 1.2
- 1x D-Link Gigabit switch
- 1x Inepo Multi USB Port Charger

In the future I plan to replace the Pi 3s with Pi 4s and add two more to have a 5 nodes kube cluster.
Prerequisietes
Before starting I assume you already have your Raspberry cabled and on the same network with dhcp. In addition to that I assume you flashed a clean version of Raspbian Buster Lite on all your SD cards and added a ssh file in the root folder of every card to be able to log into your Raspberrys. Looking at your router dhcp logs, you should be able to find the ips of your Raspberrys and ssh into them to perform the following pre-configs.
Log into every Raspberry and do this. Remember to change IP and hostname for every Raspberry!
ssh pi@ip_of_your_raspberry # default password is raspberry
sudo echo "master-01" > /etc/hostname # CHOOSE A DIFFERENT HOSTNAME FOR EVERY RASPBERRY!
# Now we set a different ip address for every Raspberry
sudo tee <<EOF >> /etc/dhcpcd.conf
    interface eth0
    static ip_address=192.168.0.100/24
    static routers=192.168.0.1
    static domain_name_servers=8.8.8.8
EOF
# And then we enable some configs needed to run Kubernetes at its best
sudo sed -ie "/gpu_mem/c\gpu_mem=16" /boot/config.txt
sudo sed -ie 's/$/ cgroup_enable=cpuset cgroup_memory=1 cgroup_enable=memory/' /boot/cmdline.txt
# And then reboot so our changes take effects
sudo reboot
Now for every Raspberry let's add our ssh key so we will easily ssh into them after.
ssh-copy-id pi@192.168.0.1 # repeat this for every Raspberry node!
K3s and k3sup
And now let's do some magic with k3s and k3sup. As you probably know k3s is a minimal distribution of Kubernetes (perfectly compatible with it) with a lot of unneeded stuff stripped away. K3s installation is already super easy and smooth, but with k3sup everything is much easier and you don't even need to log into your Raspberries! So after you configured everything as described in the previous section, let's download and install k3sup (this should be done on your laptop/pc):
curl -sLS https://get.k3sup.dev | sh
sudo install k3sup /usr/local/bin/
k3sup --help
After that, all you need to do to bootstrap a Kubernetes masternode is:
k3sup install --ip 192.168.1.41 --user pi # use the ip of the Raspberry you configured to be the master
To check if everything went fine:
export KUBECONFIG=`pwd`/kubeconfig
kubectl get node
If everything went fine, you should see your master node marked as ready.
Now you could stop here or (as I did) add more workers to build a proper Kubernetes cluster. To do that simply type:
k3sup join --ip 192.168.1.43 --server-ip 192.168.1.41 --user pi
where the --ip is the ip of the worker you want to add and the --server-ip is the ip of the master. That's basically it! Again with kubectl get node you will see your worker(s) appearing and becoming part of your cluster.
